In software program improvement, managing code throughout a number of contributors can get messy quick. Think about a number of folks enhancing the identical doc on the similar time, every including new concepts, fixing bugs, or tweaking options. With no structured system in place, it’s extremely tough to trace who modified what, when, and why? Errors might be exhausting to undo, and merging totally different variations of a undertaking can shortly develop into chaotic. That is the core downside that Git, and by extension, GitHub goals to unravel, giving builders a strong strategy to monitor adjustments, collaborate effectively, and handle a number of variations of a codebase with out stepping on one another’s toes. This text would function a Git tutorial for these battling it, and would offer a walkthrough from a newbie’s purview.
What’s Git?
Git is a distributed model management system. It’s used to watch code adjustments, over time. It permits builders to work individually and mix their work with out clashes. Git additionally supplies a separate copy of your entire undertaking together with code historical past, this makes it quicker and extra dependable. Therefore it’s appropriate for each particular person and collaborative initiatives. Git is usually command-line primarily based, it supplies customers with a strong toolbox to department off options, commit updates, stage adjustments, and exactly undo errors. It’s essential to do not forget that Git is only a instrument for managing code; it’s utterly impartial of internet sites like GitHub and may function with out the web or any internet hosting companies.
Core Ideas You Must Know
Right here’s a fast breakdown of the primary concepts behind Git:
- Repository (Repo): A listing the place Git tracks your information and adjustments.
- Clone: A replica of a distant repository in your native machine.
- Commit: A snapshot of your code at a given second with a message describing the change.
- Department: A separate model of your codebase to work on new options or fixes.
- Merge: Integrating adjustments from one department into one other.
- Push/Pull: Sending your adjustments to GitHub or flattening others’ updates.
Learn how to Entry Git
Following are the three other ways in which you’ll entry Git:
- Command line – essentially the most broadly used strategy to entry Git.
- IDEs – Hottest extensions for Git is gitlens – it convey tons of extensions in vs code
- GUI for Git – You’ll be able to check with the official web site – https://git-scm.com/downloads/guis
- GitKraken – Git GUI is likely one of the widespread GUI
- SourceTree – that is obtainable just for home windows and mac
We are going to primarily deal with the command line on this article. To Set up Git please observe this information.
Palms-on
Now, that we’ve coated the fundamentals and arrange Git on our system, it’s time to get our arms soiled. On this part, we’ll go over among the most important Git instructions that each developer ought to know. Whether or not you’re beginning a brand new undertaking or collaborating on an current one, these instructions kind the core workflow of utilizing Git successfully. We’ll hold it easy, sensible, and beginner-friendly. No fancy setups, simply actual instructions you’ll truly use. Open your terminal, and let’s dive in!
Create a listing
mkdir git_learningAltering listing
cd git_and_githubInitialize git
git initThis command with initialize the Git repository.
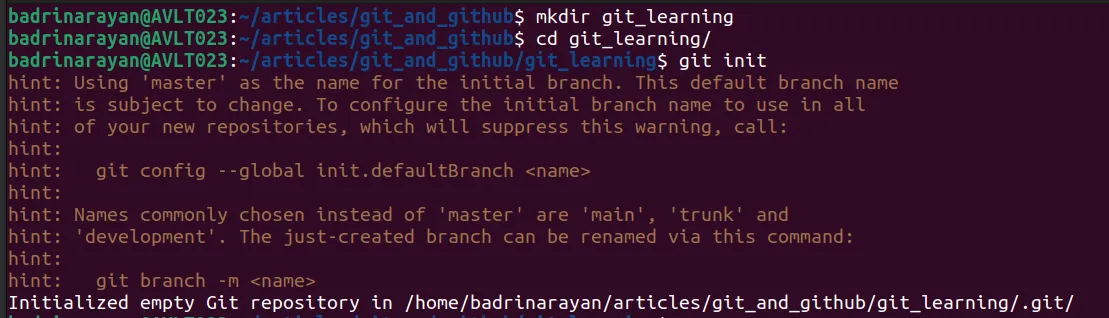
You will discover a .git folder. That is the essential folder that’s maintained by Git. It will get created when the git init command is executed. Git principally makes use of hashes to retailer information, it’s actually reminiscence environment friendly.
Now let’s create some information.
Making a file
contact file1.txt Enhancing the file
vi file1.txt Enter i to get into insert mode, and add in some textual content, then, click on escape and kind :wq to avoid wasting the file.
Do it for the opposite file as nicely.
contact file2.txt

vi file2.txt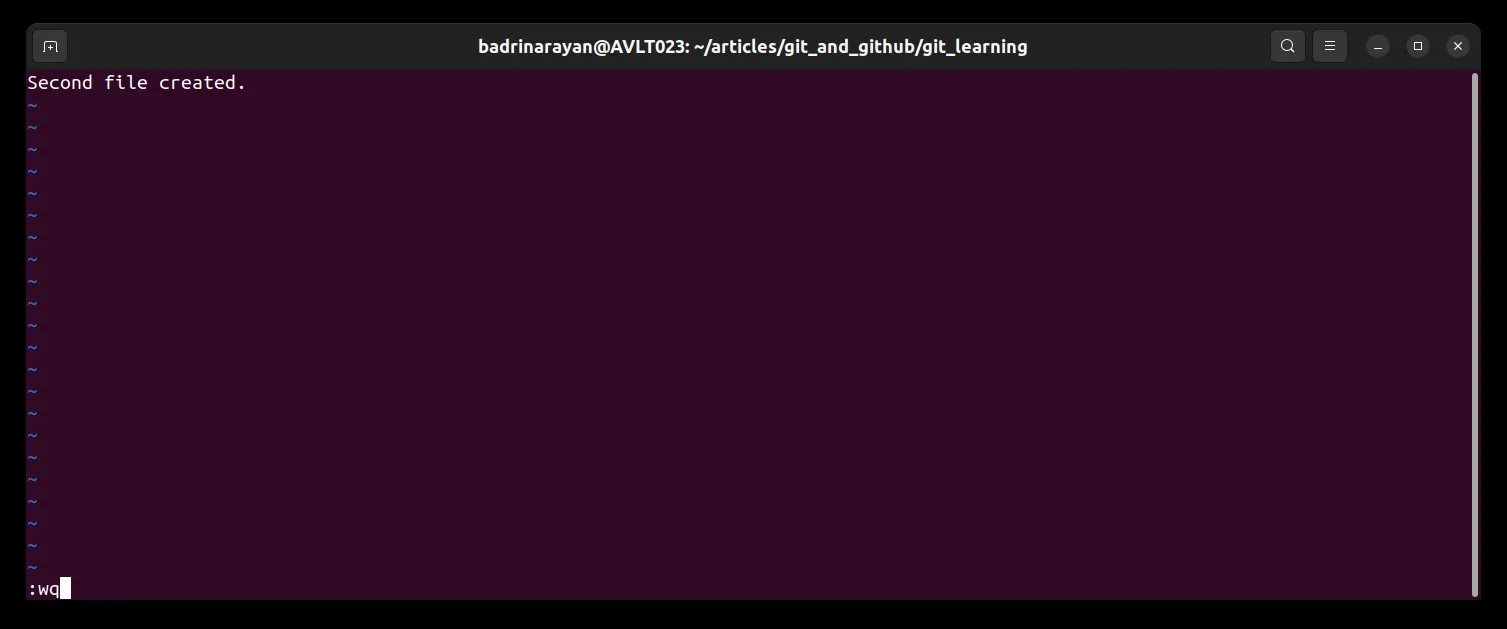

To know the standing of the repository
git standingThis command will present the adjustments made within the listing and whether or not they’re tracked or not.
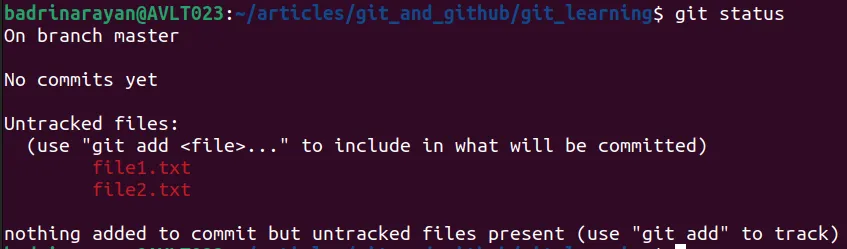
For a brief standing you should use
git standing -s Staging space in Git
Earlier than making a commit in Git we now have one thing known as staging space. The place we’ll see the adjustments made and would overview them earlier than making a commit. It is a particular function in Git. We are able to overview the adjustments between the earlier commit and the staged adjustments after which make a brand new commit.
To stage the adjustments carried out in our listing we’ll use
git add

git add file1.txt file2.txt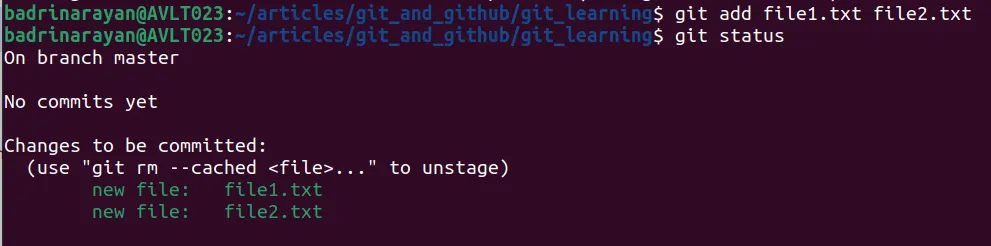
This can begin monitoring the adjustments made within the listing.
Now, so as to add all of the information within the listing to staging, you possibly can merely use:
git add .be cautious when utilizing this command. It’s because it could monitor all the things in your listing like logs, surroundings information, datasets, and so on. This may overload Git and trigger inefficient model administration.
Every commit has a:
- ID – Distinctive identifier (a hashvalue).
- Message – Description of what adjustments have been carried out.
- Date/Time – when was it modified.
- Creator – Who has modified the information.
- Full snapshot – on the time of commit.
Chances are you’ll assume that saving your entire snapshot each time in commit will make use of reminiscence which could be very inefficient. However Git doesn’t retailer duplicate content material and compresses the contents as a way to scale back reminiscence house. So, it is perhaps a viable technique in any case!
Committing Modifications
git commit -m “Brief description”-m is for message.

However typically, we’ll not be proud of a brief description. We must present extra context on the adjustments carried out.
To try this we’ll simply use:
git commit This can open a file in our editor, the place we will kind an outline which is lower than 80 characters (don’t overlook so as to add a line break after the outline). To realize this, let’s make some adjustments for a brand new commit. Let me add one other empty file and commit the adjustments.
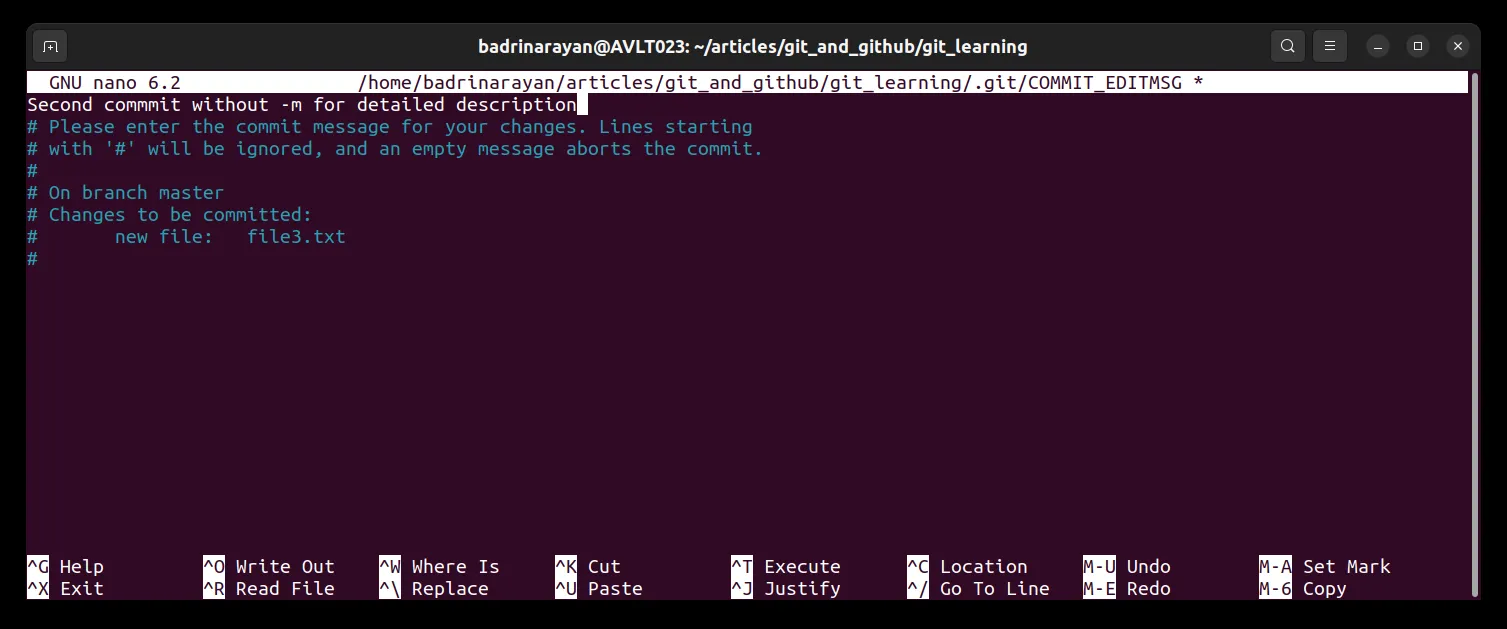
One false impression is “after we commit the staging; the staging space turns into empty!.” That is incorrect. The staging space doesn’t develop into empty as a substitute there isn’t any distinction between staging space and former commit.
Tips:
- Commits shouldn’t be too huge or too small. We don’t need to commit on small adjustments for every file. Additionally, we don’t need to commit solely after a whole lot of adjustments are made. As you attain a state the place you wish to document then make a commit.
- If in case you have a typo and a bug resolved which means: you discovered a typo whereas resolving a bug; each shouldn’t be dedicated similtaneously when reverting a typo, the bug might be reverted as nicely. Therefore we now have to do it individually. Additionally, when you’ve got staged each collectively we will unstage them individually as nicely.
- Commit messages needs to be significant. Since, Git is used for collaboration as nicely (not only for model management) giving significant commit messages and following nomenclatures would assist everybody within the undertaking perceive the adjustments made.
Committing with out staging
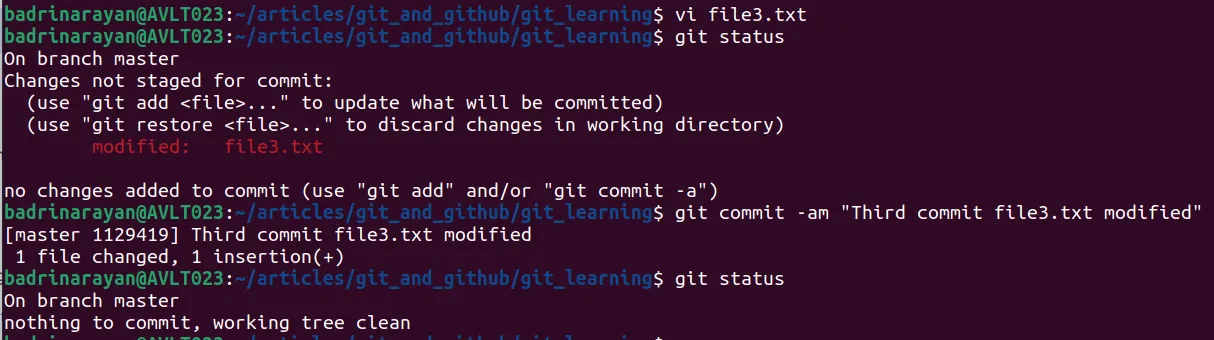
Can we commit adjustments with out including them to the staging space i.e., earlier than git add command?
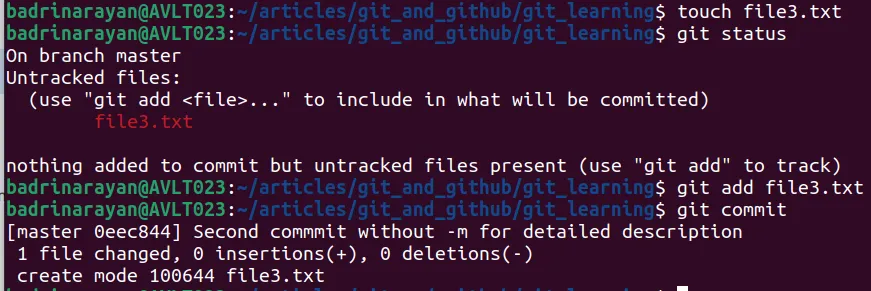
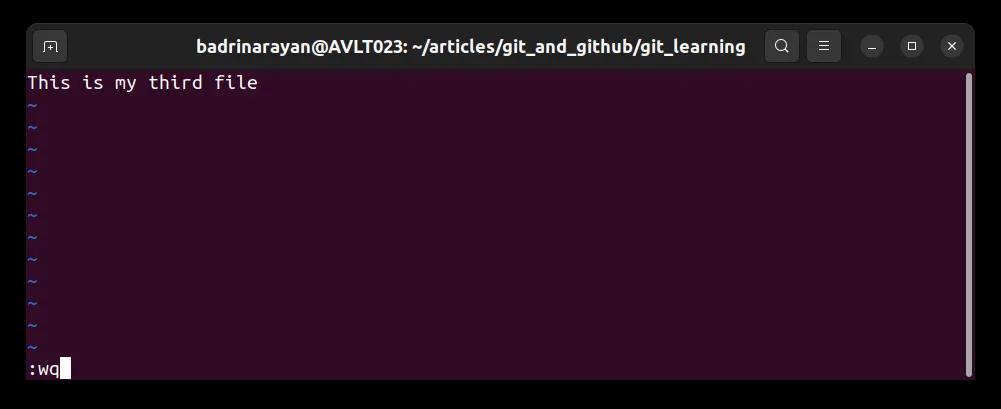
Sure! we will. Let’s have a look at an instance. Let me make a change in file3.txt.
git commit -am “message” -a tells Git to robotically stage any information which were modified and already tracked.
Let’s say you could have staged your complete repository, however you’d wish to take away a file. Often, you’ll use the rm command to take away the file. However that file will nonetheless be within the staging space, so to take away that as nicely we might be doing beneath steps.
One attainable approach is to make use of a standard rm command after which git add <deleted_filename> to take away that from beginning space. I do know it sounds bizarre however git add right here will take away the file from the staging space.
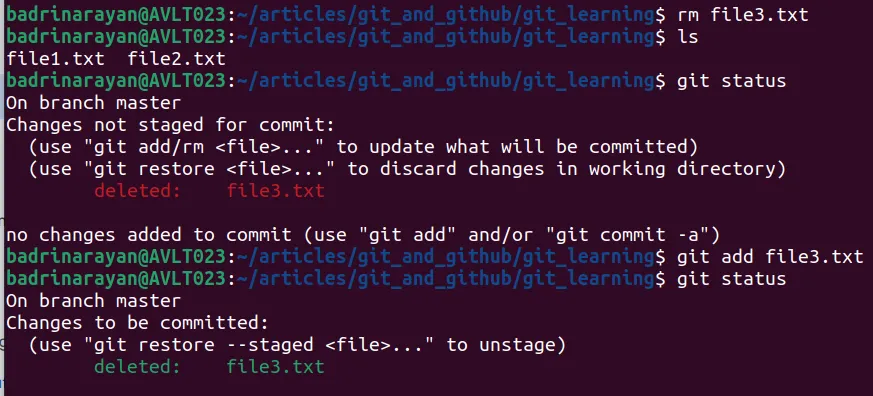
Since right here file3.txt is being tracked it reveals file3.txt is deleted.
In case there’s a file which was staged already and you’d wish to take away it, observe this:
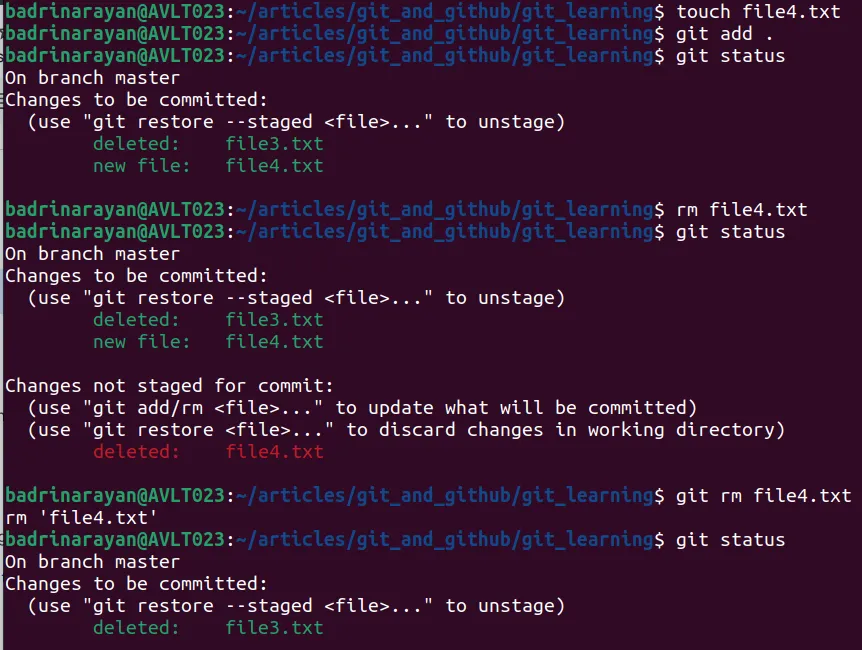
Let’s strive utilizing git rm <file_name> with out utilizing the standard rm command.

We are able to see from git standing that the brand new file is current. Later, after utilizing git rm command we will see that the brand new file will not be current. The git rm command deletes the file from the staging space and the working listing whereas the rm command (linux) solely deletes the file kind your working listing.
Learn how to ignore some information from being tracked
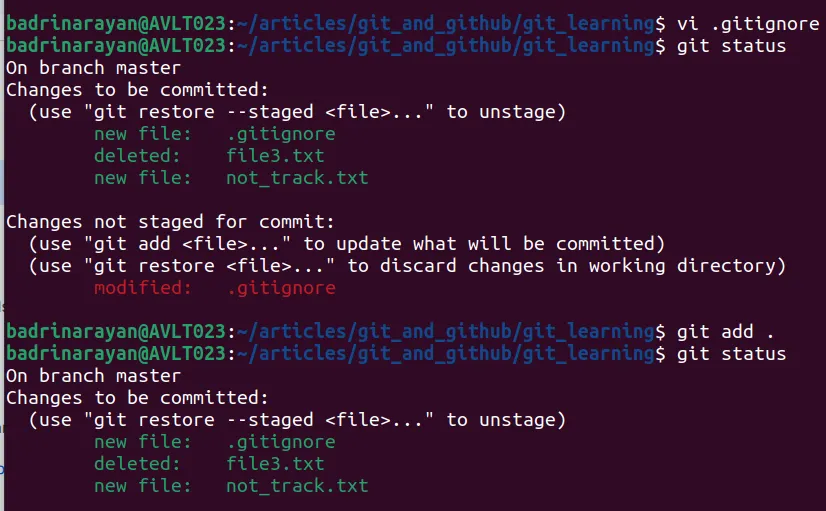
Let’s see the way to ignore monitoring of some information. However that begs the query: why would you wish to not tract information. Right here’s why, Suppose you could have log information: you generate hefty quantity of log information, dataset, this might be up to date every time a change is made to them. There principally JSON illustration but working notebooks might yield totally different outputs every time making exhausting for Git to trace adjustments. Therefore use .gitignore to keep away from Git from monitoring these information.
We are going to at all times need to ignore some information from monitoring, like log information. Including these information to the repository will simply enhance the dimensions of the repository. Subsequently, we now have to disregard these information in Git. Within the following picture, I’m making a logs listing and a logs file. Later, a .gitignore file was created after which a logs listing entry was added into the .gitignore file. This can cease Git from monitoring the required information.
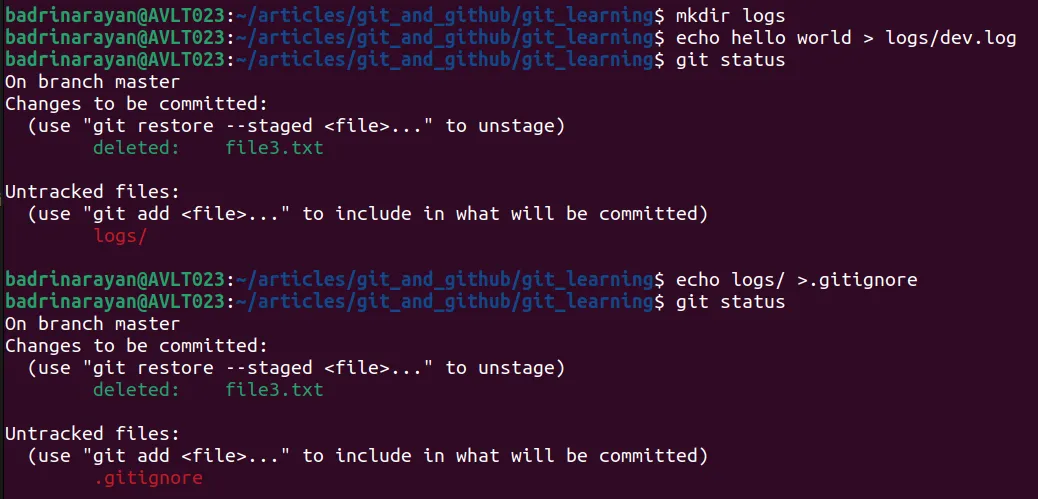
We are able to see that the logs folder will not be tracked anymore.
Dealing with the outliers
There’s one downside! Once we begin monitoring a file utilizing git add or commit, after which add that to gitignore, Git will nonetheless monitor adjustments made in that file or listing. So to keep away from that we now have to take away the information/directories from staging space. However git rm will take away the information in each staging and listing. Subsequently, If we wish to take away it solely from staging, we might be utilizing :
git rm -r – cached directory_name/filename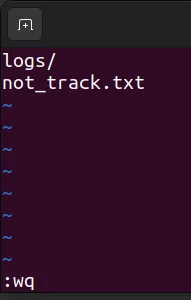
You’ll be able to see that the file not_track.txt is tracked. So to keep away from this from taking place, we now have to make use of the next command:
git rm -r –cached directory_name/filename
Seeing the distinction
Now, let’s see what adjustments have been made between the final commit and the staged information.
We are going to utilizing the beneath command to do it:
git diff --staged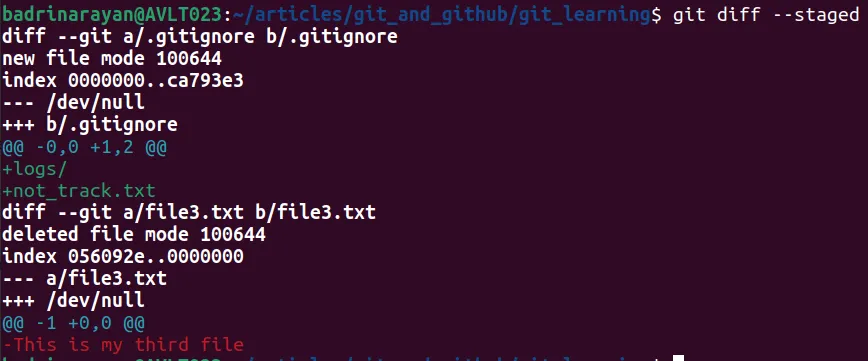
Following is the reason of the above screenshot:
.gitignore didn’t exist earlier than (/dev/null means no earlier file).
Two entries had been added:
- logs/ → Ignores the listing.
- not_track.txt → Ignores the file.
file3.txt is being faraway from the repo (staged for deletion). The file had one line: “That is my third file”.
Often builders use GUI instruments to see the diff like VS Code – however it is usually attainable to visualise the distinction utilizing the command line.
git diff involves the rescue
What git diff does is, it would evaluate the information between the final commit and the staged ones . Ex. a/file1.js is the previous file and b/file1.js is the brand new file → adjustments within the previous copy is indicated by - (minus) register crimson and adjustments within the new copy are indicated by + (plus) in inexperienced (might be seen within the picture).
Inexperienced - newly appended tracesPink - these traces might be eliminated
White - These traces are there within the previous and new code.
git diff command reveals the distinction between listing and staging.
Let’s make some adjustments within the listing to make use of this command:

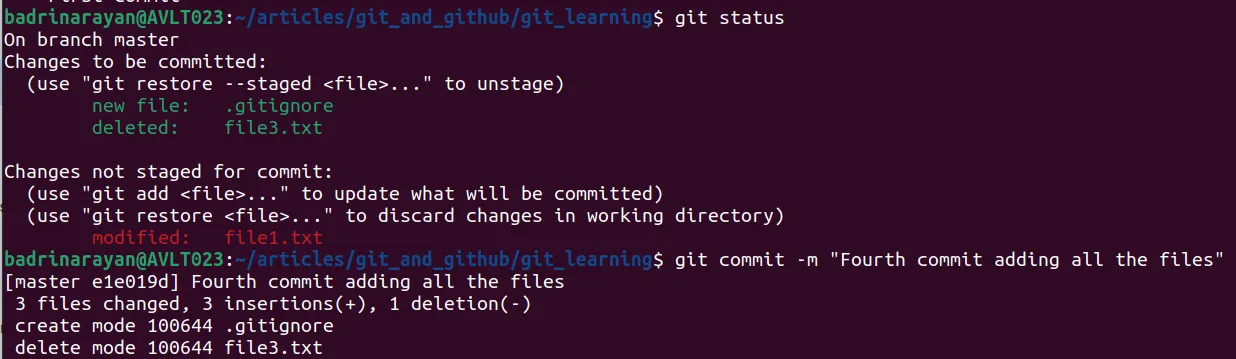
Now, let’s stage all of the information, and commit our adjustments to have a look at all of the commits which might be made up to now. To view this use:
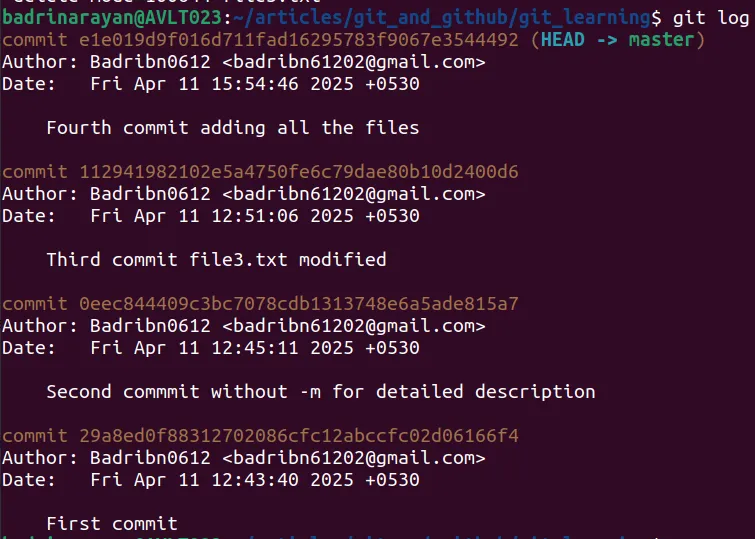
git log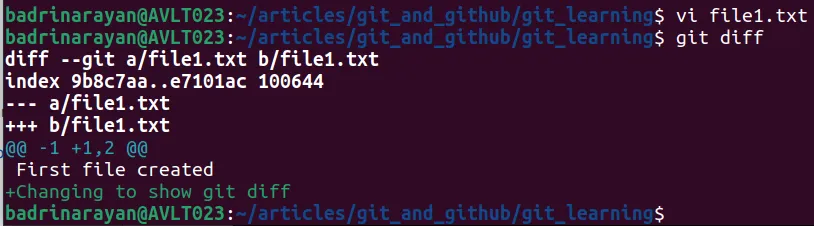
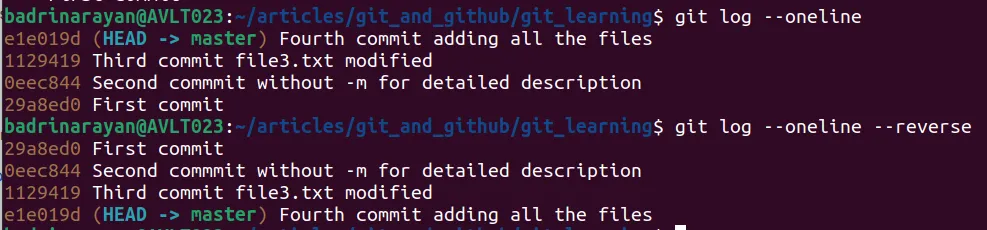
git log —oneline → this provides us a short abstract of commits.
git log —oneline —reverse → this can reverse the order of commits.
To see the adjustments in a commit we will use
git present <id of that commit>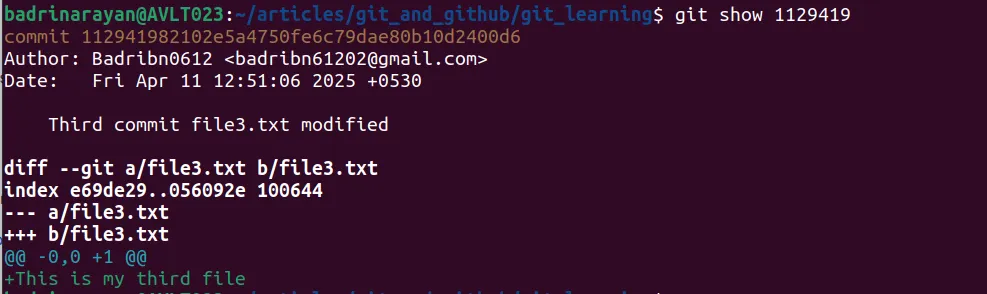
Learn how to get the earlier commit’s adjustments
git restore --staged filename → this can take the file from the earlier commit and put it right here.
git restore . will take information from staging surroundings and put it within the working listing. But when there’s a new untracked file which isn’t current in earlier commits, it would keep as it’s.
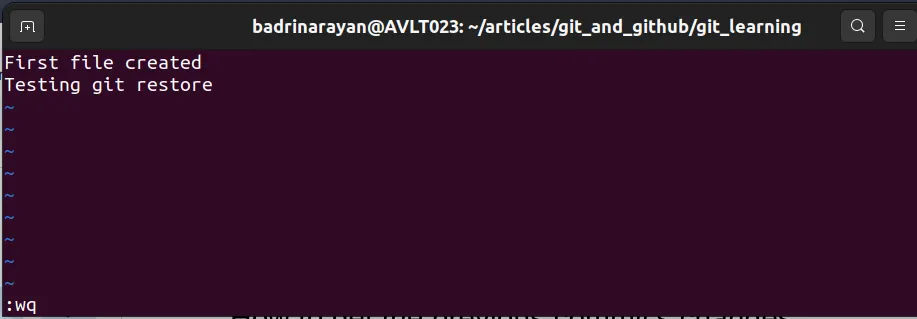
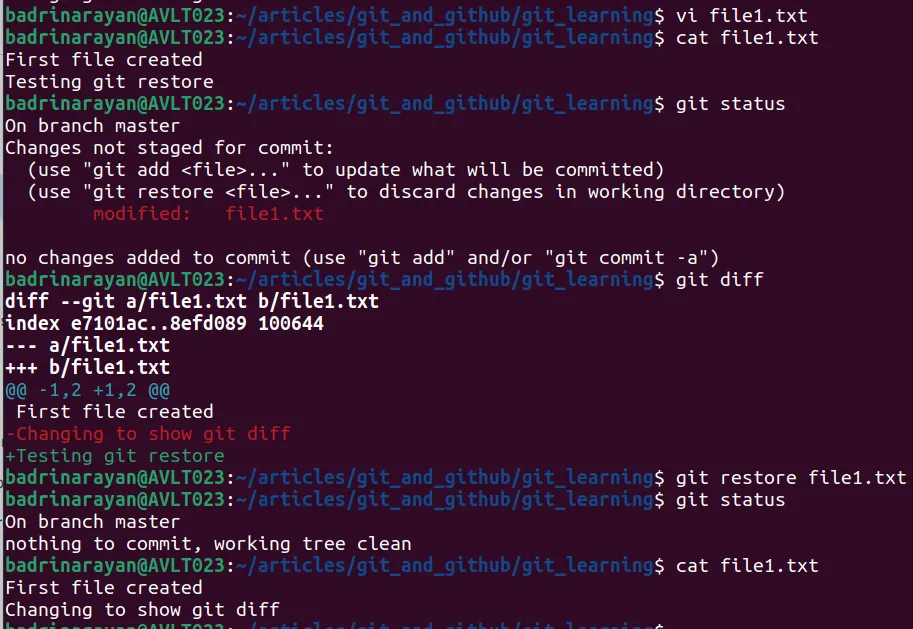
We are able to see that the adjustments made in file1.txt after working the command git restore, have been reverted to their earlier commit state.
Recap
On this hands-on session, we walked by the foundational Git instructions utilized in real-world improvement workflows. We started by organising a Git repository and realized the way to create and edit information. Key ideas such because the working listing, staging space, and commits had been launched together with instructions like git init, git add, git commit, and git standing. We explored how Git tracks adjustments, manages file variations, and handles staged vs unstaged information. Particular emphasis was given to correct commit practices, using .gitignore to keep away from monitoring pointless information, and viewing variations with git diff. Lastly, we checked out methods to examine earlier commits and get better adjustments utilizing git log, git present, and git restore.
Conclusion
Git may appear overwhelming at first, however when you grasp the core ideas like staging, committing, restoring, and viewing historical past, it turns into a strong instrument in your workflow. On this article, we centered on the command line as a result of it provides you essentially the most management and transparency over what’s taking place behind the scenes. Understanding how Git tracks information, handles commits, and manages adjustments enables you to write cleaner code, collaborate extra successfully, and get better shortly when issues go flawed. Whether or not you’re rolling again a nasty change, exploring commit historical past, or simply organizing your work, Git has acquired your again.
Knowledge science Trainee at Analytics Vidhya, specializing in ML, DL and Gen AI. Devoted to sharing insights by articles on these topics. Wanting to study and contribute to the sector’s developments. Obsessed with leveraging information to unravel complicated issues and drive innovation.
Login to proceed studying and revel in expert-curated content material.